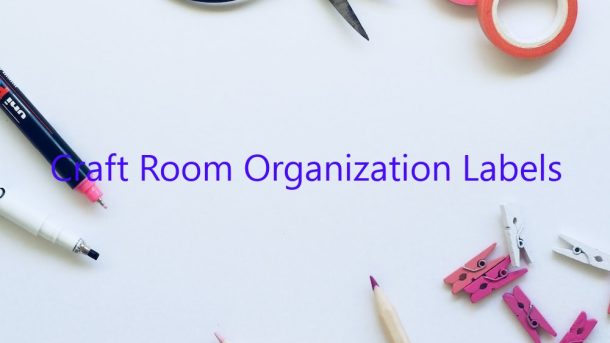
A craft room can quickly become cluttered and chaotic without the proper organization. One way to keep your craft room organized is to use labels. Labels can help you to keep track of your supplies and what project you are working on.
There are many different types of labels that you can use in your craft room. The most common type of label is a sticker label. Sticker labels are easy to use and come in a variety of different shapes and sizes. You can find sticker labels at most office supply stores.
Another type of label that you can use in your craft room is a fabric label. Fabric labels are a great way to keep track of your supplies, especially if you have a lot of fabric scraps. You can find fabric labels at most fabric stores.
If you want to get really creative, you can make your own labels. You can use a variety of materials to make your own labels, including fabric, paper, and vinyl. You can find a variety of tutorials online that will show you how to make your own labels.
No matter what type of label you choose to use, be sure to place them in a place where they will be easily visible. This will help you to keep your craft room organized and avoid any confusion.
Contents
How do I organize my craft room?
Crafting is a great way to relax and get creative, but if your craft room is a mess, it can be difficult to find what you need and to get started on a project. A well-organized craft room can make crafting a lot more fun and productive.
There are a few things to consider when organizing your craft room. First, think about the types of crafts you enjoy most and what supplies you need for those crafts. Then, decide how much storage you need and what type of storage will work best for you.
One of the best ways to organize your craft room is to use storage containers and organizers. Storage containers can be used to store crafting supplies like yarn, fabric, beads, and buttons, and organizers can be used to store tools and materials like scissors, rulers, and thread.
You can find storage containers and organizers in a variety of shapes and sizes, so be sure to choose ones that will fit in your craft room and that will meet your needs. You can also buy organizers that are designed to fit specific types of crafting supplies.
Another way to organize your craft room is to use shelving. Shelving can be used to store crafting supplies and tools, and it can also be used to create designated work areas for different crafts.
If you have a lot of crafting supplies, you may want to consider investing in a crafting table. A crafting table provides a lot of storage space and often comes with built-in organizers and storage containers. It can also be used as a work surface, which can be helpful if you have a lot of crafting supplies.
No matter how you choose to organize your craft room, be sure to make use of every available space. Use shelves to store supplies and tools, use closets to store fabrics and yarn, and use wall space to hang organizers and storage containers.
With a little bit of planning and some creative storage solutions, you can have a well-organized and fun-filled craft room that you’ll love to use.
How do I organize my Cricut Craft Room?
There are a few ways to organize your Cricut craft room. The first way is to organize your supplies by type. This might mean sorting your tools, adhesives, and fabrics into separate bins or baskets. Another way to organize your supplies is by project. You can create a project bin for every type of project you like to do, such as scrapbooking, card making, or quilting. This system is especially helpful if you have a large collection of Cricut cartridges.
One of the best ways to organize your craft room is by using labeled storage containers. This way, you’ll know exactly where to find everything when you need it. You can use different colors or shapes to identify different types of supplies. Plastic baskets, boxes, and drawers are perfect for storing small craft supplies. You can also use hanging organizers or shelves to store larger items.
No matter how you choose to organize your Cricut craft room, be sure to keep things tidy and organized. This will make it easier to find what you need and help you work more efficiently.
How do you organize a craft room checklist?
A craft room is a great way to organize all of your crafting supplies and tools in one place. But, before you can organize your craft room, you need to create a craft room checklist. This will help you to determine what you need and what you can do without.
The first step is to determine the purpose of your craft room. What type of crafts do you want to be able to do in the room? Once you know the purpose of the room, you can start to gather the supplies you will need.
If you want to be able to sew, you will need a sewing machine, thread, fabric, and scissors. If you want to be able to quilt, you will need a quilting machine, batting, and fabric. If you want to be able to knit, you will need knitting needles, yarn, and a knitting board.
Once you know what type of crafts you want to be able to do, you can start to gather the supplies you will need. This includes storage containers, shelves, and cabinets to store your supplies. You will also need a work surface, such as a table or desk.
The final step is to create a craft room checklist. This will help you to stay organized and make sure that you have everything you need in the room. You can use this checklist to determine what you need to purchase and what you can do without.
A craft room is a great way to organize all of your crafting supplies and tools in one place. By creating a craft room checklist, you can determine what you need and what you can do without.
What are must haves for a craft room?
A craft room is a great way to organize your crafting supplies and keep them all in one place. But what are the must-haves for a craft room? Here are a few ideas:
1. A worktable. This is essential for crafting. Choose a table that is large enough to fit all of your supplies, and has enough space to work on your projects.
2. Storage. You’ll need somewhere to store your supplies, so choose cabinets, shelves, or crates that will fit your needs.
3. A trash can. Keep your craft room clean and organized by having a trash can handy.
4. A recycling bin. If you’re crafty, you’re probably recycling materials already. Make it easy on yourself by having a recycling bin in your craft room.
5. A light. A good light is essential for any craft room. Choose a light that is bright and casts a good amount of light.
6. A chair. Make sure you have a comfortable chair to sit in while you craft.
7. A desk lamp. A desk lamp is a great way to add extra light to your craft room.
8. A bulletin board. A bulletin board is a great way to keep track of your projects and to keep your craft room organized.
9. A storage container. A storage container is a great way to keep your craft room organized and tidy.
10. A creative mind. The most important thing you need for a craft room is a creative mind!
How do you organize craft supplies in drawers?
Do you find yourself constantly digging through your craft supplies to find the right tool or material? If so, it might be time to reorganize your supplies. One way to do this is to organize your craft supplies in drawers.
There are a few things to consider when organizing craft supplies in drawers. First, you need to think about the types of supplies you have and group them accordingly. For example, you might want to group together all of your fabric supplies, all of your crafting tools, or all of your beads and charms.
Once you have grouped your supplies, it’s time to decide how to organize them within the drawers. One option is to organize them by type. For example, you might have a drawer for fabric, a drawer for tools, and a drawer for beads and charms. Another option is to organize them by project. This might be more helpful if you only have a few types of supplies. For example, you might have a drawer for Christmas ornaments, a drawer for embroidery, and a drawer for quilting.
No matter how you choose to organize your supplies, be sure to make use of labels to clearly identify each drawer. This will make it easier for you to find what you need when you need it.
How do I organize my kids craft area?
Kids love to be creative, and what better way to encourage that creativity than by giving them their own space to create? If you’re looking for tips on how to organize your kids craft area, you’re in the right place.
The first thing to consider is the type of crafts your child likes to do. If they enjoy painting and drawing, you’ll need a space with a table or desk where they can work. If they prefer making things out of paper and stickers, you’ll need a storage area with plenty of space to keep all of their supplies organized.
No matter what type of crafts your child enjoys, you’ll need to provide them with some basic supplies. This might include paper, pens, pencils, crayons, scissors, glue, markers, and stickers. If your child likes to make more complicated projects, you might also need to provide them with a ruler, compass, protractor, and other tools.
One of the best ways to organize your kids craft area is to use bins or containers to store their supplies. This will keep everything organized and easy to find. You can also use labels to help your child find the supplies they need.
Another important thing to consider is the amount of space you have to work with. If you don’t have a lot of room, you’ll need to be creative with your storage solutions. You might want to consider using vertical space to store supplies and using wall mounted shelves or hooks to hang supplies.
Creating a space for your child to be creative can be a lot of fun, and with a little bit of organization, it can also be easy to keep everything tidy.
How do you store 12×12 vinyl sheets?
How do you store 12×12 vinyl sheets?
The easiest way to store vinyl sheets is to place them in a storage container or binder. To do this, you will need to purchase a storage container or binder specifically designed for storing vinyl sheets. The container or binder should have pages that are 12×12 inches in size.
Another way to store vinyl sheets is to roll them up and place them in a storage container or bag. To do this, you will need to purchase a storage container or bag that is specifically designed for storing vinyl sheets. The container or bag should have a diameter of 12 inches.
When storing vinyl sheets, it is important to keep them away from direct sunlight and heat. Sunlight and heat can damage the vinyl sheets.