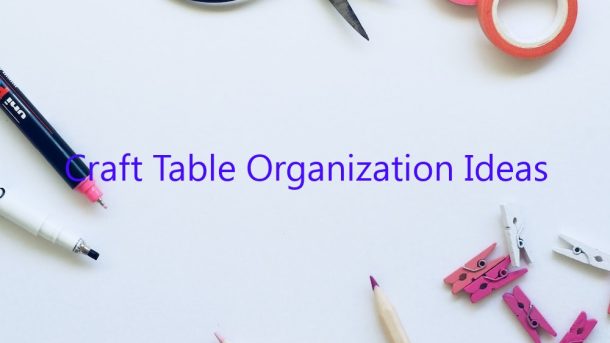
Craft tables are a popular choice for crafters, as they provide a large, open surface to work on. However, with so much space to work with, it can be difficult to keep your craft table organized. These organization ideas can help you make the most of your craft table.
The first thing to do is to declutter your craft table. Get rid of any excess supplies or tools that you no longer need. This will help you to better organize the space.
One great way to organize your craft table is to use containers. Containers can help you to store supplies and tools in an easily accessible way. There are a variety of different containers that you can use, such as baskets, boxes, and drawers.
Another way to organize your craft table is to use dividers. Dividers can help you to separate different supplies and tools. This can make it easier to find what you need when you need it.
Finally, you can use labels to organize your craft table. Labels can help you to identify different containers, dividers, and supplies. This can make it easier to find what you need, even if everything is not sorted into specific containers.
These organization ideas can help you to keep your craft table organized and tidy. With these tips, you can make the most of your craft table space.
Contents
How do you organize a crafting table?
There are many ways to organize a crafting table, but the most common way is to have one Crafting Area that is designated for a specific type of item. For example, one area for armor, one for weapons, one for tools, and one for blocks.
Another way to organize a crafting table is by using the category tabs that are found at the top of the crafting area. This way allows you to see all of the items that are available to craft in one place.
Yet another way to organize a crafting table is by using the item slots that are found on the right-hand side of the crafting area. This way allows you to see how many of each item you have in your inventory.
How do you organize craft supplies in a small space?
Craft supplies can quickly take over a small space if they are not organized properly. Here are a few tips on how to best organize your craft supplies in a small area.
One way to organize your craft supplies is by type of project. If you are mainly doing scrapbooking, then keep all of your scrapbooking supplies together. If you are mainly doing quilting, then keep all of your quilting supplies together. This will help you to find what you need quickly and easily.
Another way to organize your craft supplies is by color. This can be especially helpful if you are working on a project that requires multiple colors. It can be frustrating to search through a lot of different colored items to find the one you need.
You can also organize your supplies by size. This can be helpful if you are working on a project that requires a lot of different sized items. For example, you can keep all of your buttons together, all of your ribbon together, etc.
One of the best ways to organize your craft supplies is to use storage containers. This can help you to see what you have and it can also help to keep your supplies organized. There are a variety of storage containers available, such as boxes, baskets, and bins.
Whatever method you choose to use, be sure to stick to it. This will help to keep your craft supplies organized and easy to find.
How do you organize kids crafts?
There are many different ways to organize kids crafts. Some people prefer to organize by type of craft, while others organize by the age of the child. Here are a few ways to organize kids crafts:
1. By type of craft. This might include categories such as painting, drawing, sculpting, and so on.
2. By the age of the child. This might include categories such as toddler crafts, preschool crafts, elementary school crafts, and so on.
3. By the occasion. This might include categories such as Thanksgiving crafts, Christmas crafts, Easter crafts, and so on.
4. By the materials needed. This might include categories such as craft foam, pipe cleaners, stickers, and so on.
5. Alphabetically. This might be a good option if you have a lot of crafts and don’t want to spend a lot of time sorting through them.
6. In a container. This might be a good option if you have a limited amount of space. You can put all of the supplies for a certain type of craft in one container, and then put the container in a designated spot.
There are many different ways to organize kids crafts, and the best way to organize them will vary depending on your individual needs.
How do I organize my Dollar Tree craft room?
If you’re like me, you love Dollar Tree for all of the crafting supplies you can get for such a low price. But sometimes it can be hard to keep track of everything, especially when your craft room starts to look like a tornado hit it. Here are a few tips on how to organize your Dollar Tree craft room.
The first thing you’ll want to do is create zones in your craft room. This will help you to quickly find the supplies you need without having to search through everything. Try to group similar items together. For example, put all of your fabrics in one area, all of your beads in another area, and so on.
Another great way to organize your craft room is by using storage containers. This will help you to take advantage of every inch of space, and it will also make it easy to see what’s in each container. You can find a variety of storage containers at Dollar Tree, including baskets, bins, and boxes.
Finally, be sure to label everything. This will make it easy to find what you need, even if everything is thrown into a pile. You can use labels made for crafting, or you can simply write on masking tape or a piece of paper.
With these tips, you’ll be able to organize your Dollar Tree craft room in no time!
How do you declutter and organize a craft room?
declutter craft room
How do you organize your hobby space?
There are many ways to organize your hobby space.
One way is to designate one area for each hobby. For example, you could have a section for crafts, one for model building, one for painting, and one for collecting.
Another way to organize your hobby space is by using storage containers. You could designate one area for each type of container. For example, you could have one for paints, one for tools, one for materials, and one for finished projects.
A third way to organize your hobby space is by using shelves. You could designate one area for each type of shelf. For example, you could have one for paints, one for tools, one for materials, and one for finished projects.
The best way to organize your hobby space depends on your specific needs and preferences.
How do you display art supplies in a small space?
There are many different ways to display art supplies in a small space. One way is to use a storage container or cabinet. This can be a great way to keep your supplies organized and hidden away when not in use. You can also use a pegboard or a magnetic board to hang your supplies. This can be a great way to keep them organized and visible. You can also use a counter or desk to store your supplies. This can be a great way to keep them organized and easy to access. whichever way you choose to display your art supplies, be sure to organize them in a way that works for you.