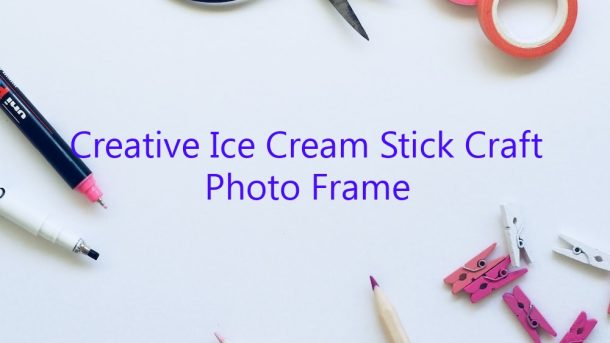
Ice cream stick crafts are not just for kids! This creative ice cream stick craft photo frame is a fun, easy project that anyone can do.
You will need:
– Ice cream sticks
– Hot glue gun
– Ruler
– Pencil
– Picture frame
– Photos
1. Begin by measuring and marking the locations of the screws on the back of the picture frame.
2. Glue a row of ice cream sticks across the top of the picture frame, making sure they are evenly spaced.
3. Glue another row of ice cream sticks across the bottom of the picture frame.
4. Glue a third row of ice cream sticks in the middle of the picture frame.
5. Let the glue dry completely.
6. Insert the screws into the marked locations and attach the picture frame to the ice cream stick frame.
7. Insert your photos into the slots in the ice cream stick frame.
This creative ice cream stick craft photo frame is a fun way to display your photos.
Contents
How do you make a picture frame with icecream sticks?
Picture frames are a popular way to display photos or other artwork. They can be bought in stores, or made at home using a variety of materials.
In this tutorial, we will show you how to make a picture frame with ice cream sticks. This is a simple and fun project that anyone can do, and it only takes a few minutes to complete.
You will need:
-Ice cream sticks
-Hot glue gun
-Paint or markers
-Ruler
-X-acto knife
Step 1: Make the frame
Start by measuring and cutting a piece of cardboard to the desired size for your frame. If you want to make a rectangular frame, cut the cardboard into a rectangle. If you want to make a square frame, cut the cardboard into a square.
Next, glue the ice cream sticks to the cardboard in a grid pattern. Make sure that the sticks are evenly spaced and that there is no space between them.
Once the glue has dried, paint or decorate the frame however you like. You can use markers, paint, or stickers to add a personal touch.
Step 2: Insert the photo
Now it’s time to insert the photo into the frame. If you want to use a photo that is smaller than the frame, you can trim it to size with an X-acto knife.
Simply place the photo behind the grid of ice cream sticks, and then use hot glue to attach it to the back of the frame.
Your picture frame is now complete! Display it on a shelf, a desk, or a table.
How do you make a frame with a stick?
There are many ways to make a frame with a stick. One way is to use a forked stick. Find a stick with two branches that come out of it close to each other. Then, use a piece of string or some other kind of cord to tie the branches together. You can use this frame to hold up a tarp or other piece of fabric.
Another way to make a frame with a stick is to use a Y-shaped stick. Find a stick with a Y-shaped branch coming out of it. Then, use a piece of string or some other kind of cord to tie the three branches together. You can use this frame to hold up a tarp or other piece of fabric.
You can also use a stick to make a simple frame. Find a straight stick that is at least as long as the object you want to frame. Then, use a piece of string or some other kind of cord to tie the ends of the stick together. You can use this frame to hold up a piece of paper or other object.
What can I build with ice cream sticks?
There are many things that can be built with ice cream sticks. They can be used to make simple sculptures, or they can be used to create more complex structures.
One simple way to use ice cream sticks is to make a sculpture of a person or an animal. To do this, start by arranging the sticks into the basic shape of the person or animal. Then, use smaller sticks or pieces of straw to add details to the sculpture.
Another way to use ice cream sticks is to create a model of a building or other structure. To do this, start by arranging the sticks into the basic shape of the building. Then, use smaller sticks or pieces of straw to add details to the model.
Ice cream sticks can also be used to make a toy car or other vehicle. To do this, start by arranging the sticks into the basic shape of the car. Then, use smaller sticks or pieces of straw to add details to the car.
Finally, ice cream sticks can be used to make a simple toy. To do this, start by arranging the sticks into the basic shape of the toy. Then, use smaller sticks or pieces of straw to add details to the toy.
How do you make a boomerang ice cream stick?
Boomerang ice cream is a fun and unique way to enjoy your favorite frozen dessert. This style of ice cream is made by shaping it into a boomerang shape and then freezing it.
To make a boomerang ice cream stick, you will need:
-An ice cream stick
-A bowl of ice cream
-A spoon
-Wax paper
1. Start by scooping a ball of ice cream onto the ice cream stick.
2. Use the spoon to shape the ice cream into a boomerang shape.
3. Place the wax paper on a baking sheet and place the ice cream stick on top.
4. Freeze for at least 2 hours.
5. Serve and enjoy!
Which glue is used to stick ice cream sticks?
There are many types of glue that can be used to stick ice cream sticks together. The most popular type of glue for this application is epoxy glue. This glue is a two-part adhesive that forms a strong bond when it is mixed together. Another type of glue that can be used is cyanoacrylate adhesive, also known as “super glue.” This adhesive is a single-part adhesive that forms a strong bond when it is applied. Both of these adhesives are available in a variety of formulations, so it is important to select the right adhesive for the job.
How do you make a homemade picture frame?
Making a homemade picture frame is a fun and easy way to frame your favorite photos, art, or prints. You can use a variety of materials to make your frame, including wood, metal, or plastic.
To make a homemade picture frame, you’ll first need to choose the material you want to use. Wood is a popular choice because it’s easy to work with, and you can find a variety of different shapes and sizes. If you’re using wood, you’ll need to cut a piece to the correct size, and then use a saw to cut out the desired shape for the frame. You can also use a router to create a decorative edge on the frame.
If you’re using metal or plastic, you can simply cut the material to the correct size and shape.
Next, you’ll need to attach the picture frame’s backing. If you’re using wood, you can use a staple gun to attach the backing. If you’re using metal or plastic, you can use screws or adhesive to attach the backing.
Finally, you’ll need to attach the frame’s front. If you’re using wood, you can use a nail gun to attach the front. If you’re using metal or plastic, you can use screws or adhesive to attach the front.
Your homemade picture frame is now complete!
How do I make a picture stick?
There are many ways to make a picture stick. One way is to use a photo adhesive like Mod Podge. You can also use a glue stick, tape, or even magnets.
If you’re using Mod Podge, you’ll need to apply a coat to the back of the picture and to the surface you’re sticking it to. Let it dry completely, and then apply a second coat. Once it’s dry, the picture will be stuck to the surface.
If you’re using a glue stick, just apply a thin layer to the back of the picture and to the surface you’re sticking it to. Let it dry completely, and then it will be stuck.
If you’re using tape, cut a piece of tape that’s about the same size as the picture. Apply the tape to the back of the picture, and then press it onto the surface you’re sticking it to.
If you’re using magnets, you’ll need to attach a magnet to the back of the picture. Then, you’ll need to find a metal surface to stick it to.