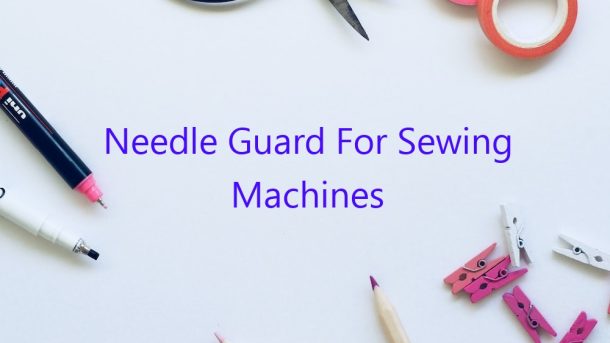
A needle guard is a small, metal or plastic shield that attaches to the front of a sewing machine needle. It is designed to keep the needle from hitting the fabric when the machine is not in use. This prevents the needle from becoming damaged and also helps to keep the fabric from becoming stained or damaged.
There are several different types of needle guards available. Some are designed to fit all sewing machine needles, while others are made to fit specific models of machines. Most needle guards attach to the needle itself, while others attach to the throat plate of the machine.
Most needle guards are very easy to install. They simply snap into place or fit over the needle like a cap. Some guards do require a little bit of assembly, but this is usually very easy to do.
Needle guards are a great way to protect your needle and your fabric. They are also a good way to keep your machine in good condition. If you are not using your machine, it is a good idea to put on the needle guard to protect the needle.
Contents
What is needle guard for sewing machine?
What is needle guard for sewing machine?
The needle guard is a device that is used to protect the user from the needle on the sewing machine. It is a metal or plastic guard that is placed over the needle when the machine is not in use. This guard helps to keep the needle from becoming damaged and also keeps the user safe from accidental injuries.
Can you add a finger guard to a sewing machine?
Can you add a finger guard to a sewing machine?
There are many different types of sewing machines on the market, and most of them have different features. Some machines come with finger guards, while others do not. If your machine does not come with a finger guard, can you add one?
Yes, you can add a finger guard to a sewing machine. There are many different types of finger guards available, so you should be able to find one that will fit your machine. The finger guard will attach to the machine in the same way as the foot pedal or the power cord.
finger guards are available for both home machines and industrial machines. They are made of a variety of materials, including metal, plastic, and rubber. Some finger guards are clear, so you can still see the fabric while you are sewing.
There are a few reasons why you might want to add a finger guard to your sewing machine. A finger guard can help protect your fingers from the needle, and it can also help keep your fingers away from the stitching area. This can be helpful if you are a beginner sewer, because it can prevent you from accidentally sewing your fingers together.
A finger guard can also help keep your fingers from getting caught in the thread. This can happen if your machine is not threaded correctly, or if the thread gets tangled up. A finger guard can help prevent this from happening, and it can also help you get your fingers out of the way if you need to fix a mistake.
If you are thinking about adding a finger guard to your sewing machine, be sure to research the different options available. There are many different types of finger guards available, so you should be able to find one that fits your machine.
How do you use a needle guard?
A needle guard is a device that helps to protect your fingers from the sharp point of a needle. It is a small, plastic or metal shield that fits over the needle, and is held in place with a clip or screw.
To use a needle guard, first make sure that the needle is un-threaded. Then, fit the guard over the needle, and use the clip or screw to secure it in place. Be sure to handle the needle guard with care, as it can still cause injury if mishandled.
When using a needle guard, it is important to keep in mind that the guard will not protect you from all injuries. It is still possible to get poked by the needle if it slips out of the guard, so be careful when using it.
What is the function of finger guard?
A finger guard is a small piece of equipment that is worn on the hand to protect the fingers. It is most commonly used in sports such as boxing, martial arts, and wrestling, where it can help to prevent injuries to the fingers. Finger guards can also be used to protect the fingers from burns or cuts.
What are the 4 types of machine guards?
There are four types of machine guards: fixed, adjustable, integral, and perimeter.
Fixed guards are permanently attached to the machine and cannot be adjusted. They are typically used on large machines where there is a danger of someone being injured by the moving parts.
Adjustable guards can be moved to different positions on the machine and can be adjusted to fit the size of the part that is being worked on. They are typically used on small machines.
Integral guards are built into the machine and cannot be moved. They are typically used on small machines where there is a danger of someone being injured by the moving parts.
Perimeter guards are placed around the perimeter of the machine and protect people from being injured by the moving parts. They are typically used on large machines.
Why does my needle keep hitting my needle plate?
It is not uncommon for a sewing machine needle to occasionally hit the needle plate, particularly if the fabric being sewn is thick or if the needle is incorrectly inserted into the machine. However, if your needle is hitting your needle plate constantly, there may be a problem with your machine that needs to be fixed.
One possible cause of a needle repeatedly hitting the needle plate is a misaligned presser foot. If the presser foot is not aligned properly with the needle, it can cause the fabric to be pushed down too far, which can cause the needle to hit the needle plate. You can adjust the alignment of the presser foot by loosening the screw on the side of the foot and adjusting the foot until it is aligned with the needle.
Another possible cause of a needle hitting the needle plate is a misaligned throat plate. If the throat plate is not aligned properly with the needle, it can cause the fabric to be pushed down too far, which can cause the needle to hit the needle plate. You can adjust the alignment of the throat plate by loosening the screws on the sides of the plate and adjusting the plate until it is aligned with the needle.
If the needle is hitting the needle plate because the fabric is being pushed down too far, you can try using a stabilizer on the fabric to help keep it from being pushed down. A stabilizer is a thin piece of fabric that is placed between the fabric and the needle plate to help keep the fabric from moving.
If none of the above solutions fix the problem, there may be a problem with the machine that needs to be fixed by a technician.
How do you hide raw edges in sewing?
Raw edges can be a little bit tricky to hide in sewing, but it’s definitely not impossible. There are a few different methods you can use, so let’s take a look at each one.
Option 1: Turning the Edge
This is probably the most common way to hide raw edges in sewing. All you need to do is turn the edge of the fabric under by a 1/4 inch and stitch it in place. This will create a nice, neat finish.
Option 2: Binding the Edge
If you want to hide the raw edge a bit more securely, you can bind it with some bias tape. This is a thin strip of fabric that’s been folded in half and sewn together. It’s available in a variety of colors and prints, so you can find one that will match your fabric.
To bind the edge, simply place the bias tape around the edge of the fabric and stitch it in place. You can use a sewing machine or do it by hand.
Option 3: Zipping the Edge
If you want to hide the raw edge and also keep it from fraying, you can zip it. This is a technique that’s often used with lace or other delicate fabrics.
To zip the edge, you’ll need a zip foot for your sewing machine. This is a special foot that has a small blade on the bottom that helps you sew close to a zipper.
Start by sewing the edge of the fabric to the zipper. Be sure to leave a small opening at the end so you can pull the fabric through. Then, use the zip foot to sew along the edge of the zipper. This will keep the fabric from fraying.