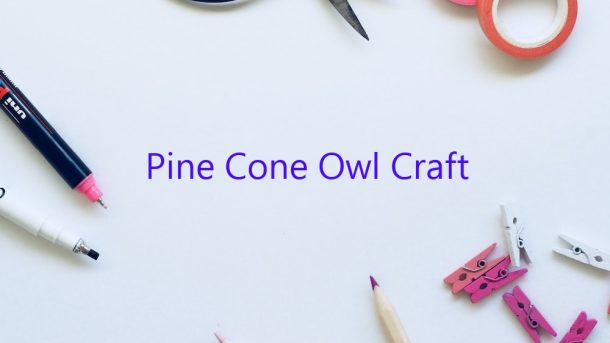
If you’re looking for a fun and easy craft to do with your kids, look no further than the pine cone owl! This project is simple, but the end result is adorable.
You will need a few supplies to make your owl:
-pine cones
-craft feathers
-hot glue gun
-scissors
-white craft paint
-black marker
First, paint the pine cones white. Let them dry completely.
Next, glue on the feathers. Start by gluing the larger feathers to the top of the pine cone. Then, add the smaller feathers around the edge.
Finally, use the black marker to draw on the eyes and beak.
Your owl is now ready to be displayed!
Contents
How do you make an owl out of pine cones?
If you’re looking for a fun and easy craft project, why not try making an owl out of pine cones? This simple project can be done with materials that you likely have lying around your home, and it’s a great way to use up some of those pesky pine cones that seem to multiply every autumn.
To make an owl out of pine cones, you’ll need:
-Several pine cones
-Scissors
-Paint or a markers
-A hot glue gun
-Wiggle eyes
First, cut the tips off of the pine cones so that they are all roughly the same size. Then, use paint or markers to give your owl some personality. You can make it cute or spooky, depending on your mood.
Next, use the hot glue gun to attach the wiggle eyes to the front of the owl. Finally, use more hot glue to attach the pine cones together to form the owl’s body. Allow the glue to cool and harden before displaying your new creation.
How do you make a snowy owl pine cone?
Making a snowy owl pine cone is a fun and easy craft project that you can do with your kids. It only takes a few simple supplies and a little bit of time to create a beautiful and festive decoration for your home.
To make a snowy owl pine cone, you will need:
– A pine cone
– White paint
– A paintbrush
– Black, white, and light brown felt
– A glue gun
– Scissors
First, paint the pine cone white. Let it dry completely.
Next, cut out a large owl shape from the black felt. This will be the body of the owl.
Cut out two smaller owl shapes from the white felt for the wings.
Finally, cut out two small circles from the light brown felt for the eyes.
Adhere the wings and eyes to the body of the owl with the glue gun.
That’s it! You have now created a beautiful snowy owl pine cone decoration.
What crafts can you do with pine cones?
There are many different crafts that you can do with pine cones. One popular craft is to make a wreath out of them. You can also make a garland, ornaments, or a centerpiece. You can also use them to make a pine cone bird feeder. All you need is some wire, a hot glue gun, and some bird seed. You can also make a pine cone fire starter. All you need is some wax, a knife, and some pine cones.
Do you need to bake pine cones before crafting?
Do you need to bake pine cones before crafting?
The answer to this question is no, you do not need to bake pine cones before crafting with them. In fact, baking pine cones can actually damage them, so it is best to avoid this step if possible.
There are a number of different ways to craft with pine cones, and no matter which method you choose, the cones will need to be cleaned and dried first. This can be done by brushing them off with a dry brush, or by briefly spraying them with a water bottle.
Once the cones are clean and dry, you can begin crafting with them. One popular option is to use Mod Podge to attach glitter, beads, or other decorations to the cones. You can also paint them or use them in other crafts projects.
If you plan to use pine cones in a Christmas-themed project, you can add a touch of holiday cheer by spraying them with a bit of fake snow. This will give them a frosty appearance and add a bit of extra decoration to your project.
No matter what type of project you choose, pine cones make a beautiful and natural addition. So don’t be afraid to experiment with different crafting methods and see what you can create.
How do you make an owl ornament?
There are many ways that you can make an owl ornament. One way is to use a Styrofoam ball as the body of the owl. You can then use pipe cleaners to create the wings, tail, and head of the owl. Another way to make an owl ornament is to use a wooden ball as the body of the owl. You can then use a thin piece of wood to create the wings, tail, and head of the owl. You can also use a hot glue gun to attach the wings, tail, and head to the body of the owl.
How do you make a snow owl?
There are many ways to make a snow owl, but the most popular way is to use a Styrofoam ball.
1. Cut a small hole in the ball, just big enough for the beak to fit through.
2. Cut a small triangle out of white felt and glue it to the front of the ball for the owl’s beak.
3. Cut two small circles out of black felt and glue them to the top of the ball for the owl’s eyes.
4. Cut out a small strip of white felt and glue it to the bottom of the ball for the owl’s belly.
5. Cut a small triangle out of black felt and glue it to the back of the ball for the owl’s head.
6. Use a black marker to draw wings onto the sides of the ball.
7. If desired, use a white marker to draw snowflakes onto the ball.
How do you prepare pine cones for crafts?
Pine cones make a great craft supply because they are readily available and come in a variety of sizes. Before you can use them in your crafts, you need to prepare them. This involves removing the scales from the cone and cleaning it up. It’s a process that takes a little time, but it’s worth it because the finished cones look great.
To remove the scales from the cone, hold the cone so the point is facing down and use a sharp knife to slice off the scales. You can also use your fingers to peel them off. Try to remove as many of the scales as possible, but don’t worry if there are some left on.
The next step is to clean up the cone. Use a toothbrush to scrub away any remaining scales or debris. You can also use a damp cloth to wipe it clean.
Now the cone is ready to use in your crafts. You can paint them, decorate them with glitter, or use them to make wreaths and other decorations.